

Top Tips for Installing Ciot Tiles: A DIY Guide
Master the Art of Installing Ciot Tiles with These Expert Tips
Installing Ciot tiles yourself can be a rewarding project that transforms your home’s aesthetic. With their renowned quality and durability, Ciot tiles are a fantastic choice for any space. In this guide, we’ll walk you through the step-by-step process of installing Ciot tiles and share essential tips for maintaining them, ensuring your project is a success.
Preparation: Gathering Tools and Materials
Before you start, make sure you have all the necessary tools and materials:
- Ciot tiles
- Tile adhesive
- Tile spacers
- Notched trowel
- Tile cutter
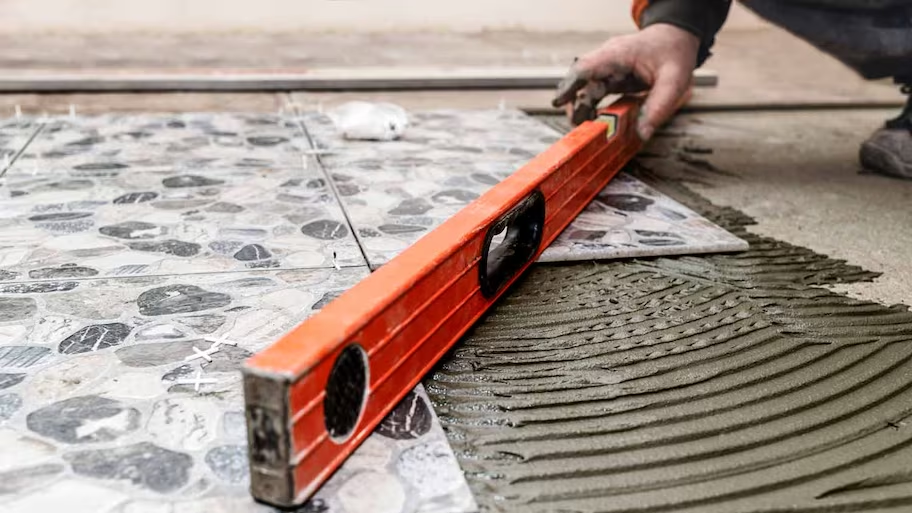
- Level
- Grout
- Grout float
- Sponge
- Measuring tape
- Safety gear (gloves, goggles)

Step 1: Preparing the Surface
Ensure the surface where you’ll be laying the tiles is clean, dry, and level. Remove any old flooring or debris, and repair any cracks or uneven areas. This step is crucial for a smooth installation and to prevent future issues with the tiles.
Step 2: Planning the Layout
Plan your tile layout before you start applying adhesive. Begin by dry-laying the tiles to see how they fit. This helps you make necessary adjustments and ensures you have the right number of tiles and cuts. Start from the center of the room and work your way outwards for a balanced look.

Step 3: Applying the Adhesive
Use a notched trowel to spread tile adhesive on a small section of the floor. Work in small areas to prevent the adhesive from drying out before you can place the tiles. Press each tile firmly into the adhesive and use tile spacers to maintain consistent gaps between tiles.

Step 4: Cutting and Fitting Tiles
Measure and cut tiles as needed to fit around edges and corners. A tile cutter or wet saw can help make precise cuts. Be sure to wear safety gear while cutting tiles. Place cut tiles into position, ensuring they align well with the adjacent tiles.

Step 5: Grouting the Tiles
Once the adhesive has set (follow the manufacturer’s recommended drying time), remove the tile spacers and prepare your grout. Apply the grout using a grout float, pressing it into the spaces between the tiles. Wipe off excess grout with a damp sponge before it dries.

Step 6: Cleaning and Sealing
After the grout has dried, clean the tile surface with a damp sponge to remove any grout residue. Allow the grout to cure completely before sealing. Applying a grout sealer can help protect against stains and moisture, extending the life of your tiled surface.

Maintaining Your Ciot Tiles
To keep your Ciot tiles looking new, regular maintenance is key. Sweep or vacuum regularly to remove dirt and debris. For deeper cleaning, use a mild detergent and water. Avoid harsh chemicals that could damage the tiles or grout. Periodically check and reseal the grout to keep it in good condition.

Final Thoughts
Installing Ciot tiles can enhance the beauty and functionality of your home. By following these steps and maintenance tips, you’ll ensure a professional-looking finish that lasts. For more expert advice and tips on flooring projects, visit us at squarefootflooring.com.
