There's something about a scratch on a beautifully engineered hardwood floor that just catches the eye, isn't there? It’s like that first chip on a brand-new smartphone screen. You know it’s there, whispering, “Look at me,” every time you walk by. But hey, life happens. And so do scratches. The good news? You can fix them, and I’m here to walk you through it, step by step, just like I learned to do after moving into an old fixer-upper with floors that had seen better days.
Getting to Know Your Floors
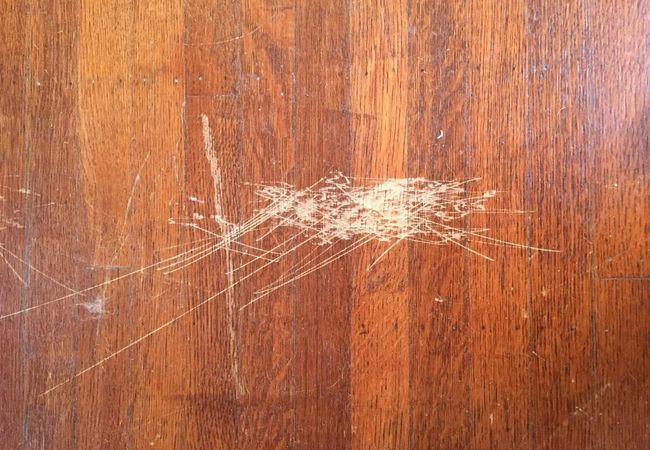
The Scratch Patrol: What’s the Damage?
First off, take a deep breath and size up the scratch. Is it just a surface thing, or has it gone deep, personalizing your floor in a way you hadn’t intended? Knowing this will help you figure out how to tackle the problem.
Surface Scratches: The Lightweights
Surface scratches are those shallow marks that haven’t fully penetrated the wood’s veneer. Here’s how I dealt with mine:
Clean it Up: Grab a soft cloth and some hardwood floor cleaner to make sure you’re not trying to buff dirt into your floors.
Buff it Out: Sometimes, all you need is a little elbow grease. With a soft, dry cloth, gently work over the scratch in a circular motion. You’d be surprised how often this is enough to make it disappear.
Oil it Down: If the scratch is still laughing at you, get a little bit of hardwood floor oil or walnut oil. Dab a bit on the scratch, and then buff gently. It’s like moisturizer for your floor, helping to blend the scratch into oblivion.
Deep Scratches: The Heavyweights
For those deeper grooves that feel like mini-trenches, you’ll need to bring in the big guns:
Wood Filler is Your Friend: Pick a wood filler that matches your floor. If you’re feeling like an artist, you can even mix colors to get the perfect shade. Apply it to the scratch using a putty knife, smooth it over, and let it dry. Sand it Smooth: Once the filler’s dry, gently sand it down so it’s flush with the rest of the floor. Be gentle; you’re smoothing things over, not trying to start a fire.
Seal the Deal: Apply a little finish to the area to seal the filler in and protect it. Make sure it matches the rest of your floor’s finish, whether it’s matte, satin, or glossy.